- Collaboration
How To Record Your Screen

With teams working remotely, and learning now happening predominantly online, there are plenty of reasons to record your screen these days:
- Record a presentation
- Record lectures, lessons, and training
- Record online meetings
- Record videos to support remote onboarding
- Make video tutorials for software
- Share knowledge with remote teammates in how-to videos
- Record product demonstrations
- Troubleshoot issues remotely with IT
- Collaborate on creative assets
Native apps for recording your screen on a Windows PC or macOS offer some basic screen recording tools, but there’s a better screen recorder that makes it possible to record pretty much anything — in high definition at up to 1080p — with just a few clicks.
Related Reading: Screen Recording Software: What Should You Look For?
At Panopto, we’ve taken our best-in-class video and screen capture technologies (used at thousands of universities and businesses across the world) and made them available for anyone to use for free, without having to download and install any software, and without having to log into or sign up for a user account.
With Panopto Express, starting a screen recording is as easy as clicking a link, choosing the inputs you want to capture, and then pressing record.
What can you record with Panopto Express?
Anything — if you can show it on your screen, you can record it with Panopto Express. Record PowerPoints, Google Slides, Zoom meetings, Slack video calls, Prezis, Powtoons, webinars, and more. You can even capture audio and video of yourself presenting at the same time simply by turning on your webcam — Panopto Express then combines all of your media streams into one synchronized video that shows every single detail.
- Record multiple screens in HD
- Record from multiple video cameras in HD
- Record audio or narration along with your video screen recording
- Enable virtual background blur and replacement
- Turn your webcam into a motion-tracking camera with Smart Camera — it’s like having your own camera operator that keeps you centered in the frame as you present and move around the room
Record you and the contents of your computer screen(s) as often as you want, for as long as you want. There are no time limits, watermarks, or other stripped-down features when you use Panopto’s free screen recorder.
You can get started with screen recording by following the five ridiculously simple steps below.
How to Screen Record with Panopto Express
1. Open Panopto Express in your browser: https://www.panopto.com/record/
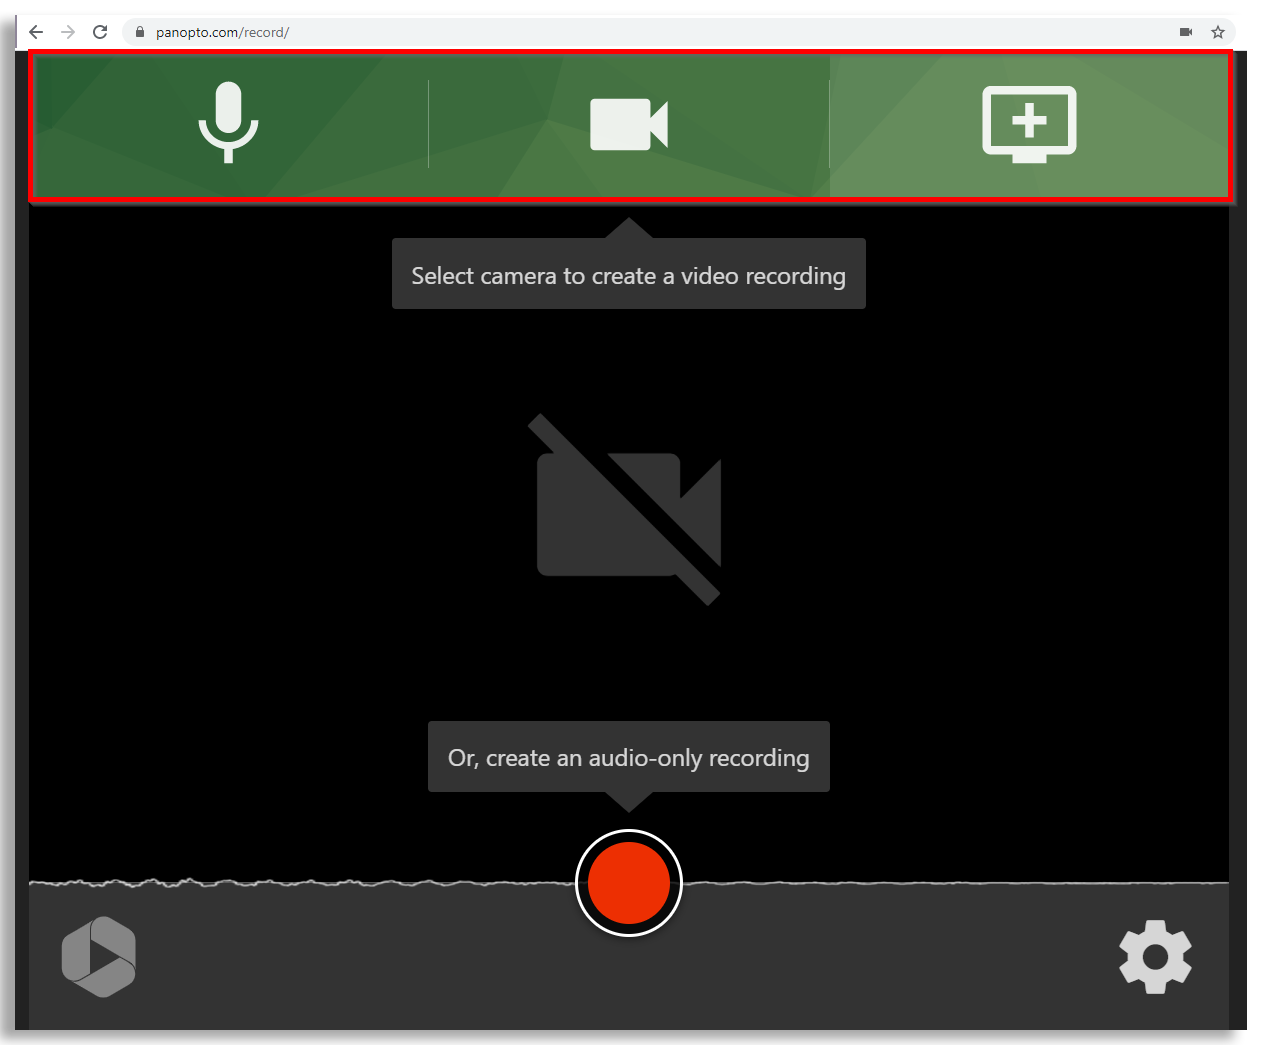
To configure your recording set up, you will use the buttons at the top of the recorder to select the audio, video, and screens you’d like to record.
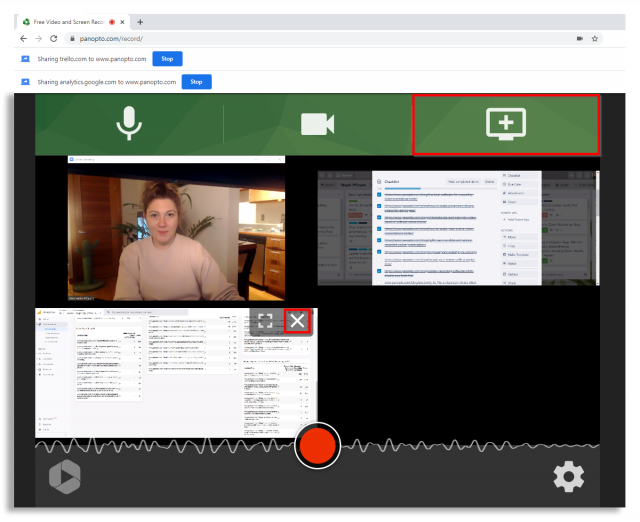
2. Select the screen(s) you want to record
Panopto Express will automatically detect screens and monitors connected to your computer. Click the screen icon at the top right and select the first screen, application window, or browser tab you want to show in your screen recording. Click the box for “Share audio” in the bottom left of the configuration window to capture your system audio — this will let you record the audio from anything on your screen such as a video conference or a webinar. Then click “Share” in the bottom right of the configuration window.
To record an additional screen, application window, or browser tab in the same recording, click the screen icon again, select what you want to record, and then click “Share.” You’ll do this until you are sharing all of the screens, windows, and tabs you want to record.

If you need to remove a screen you’ve chosen to record, simply click the “X” that appears in your preview in the top right of that video feed when you mouse-over.
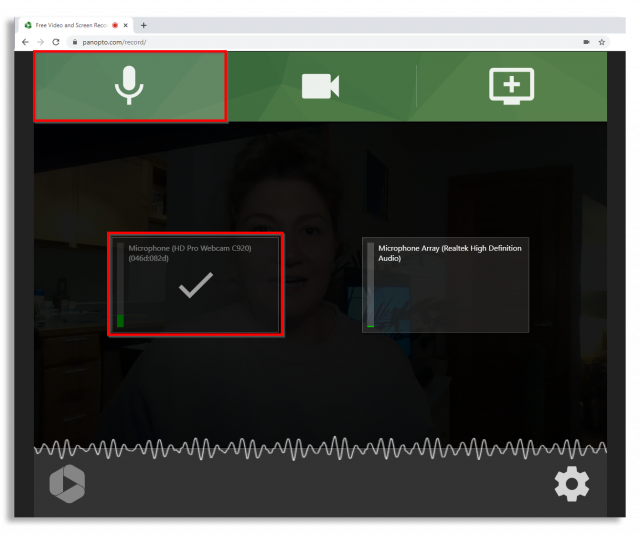
3. Select and test audio for your recording
Panopto Express will also detect connected microphones. If you would like to record narration or yourself presenting along with the screen recording, click the microphone icon at the top left and make sure the checkmark is over the microphone you want to use to capture your voice. Test your sound by talking — the oscilloscope will react to your voice and other sounds your microphone is picking up.
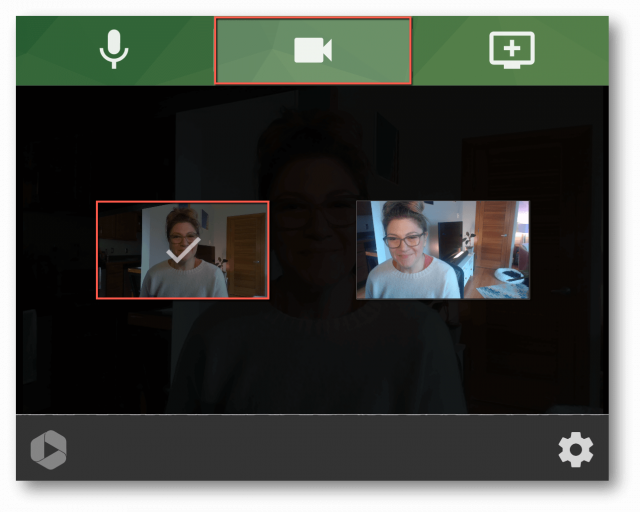
4. Add a webcam video to your screen recording (optional)
To capture video of yourself presenting along with your screencast, or to add any other video to your recording, click the video camera icon at the top and click the video feed(s) you want to capture. You will see a checkmark over the connected video sources you’ve selected to record.
Related Reading: How To Use Your iPhone As A Webcam
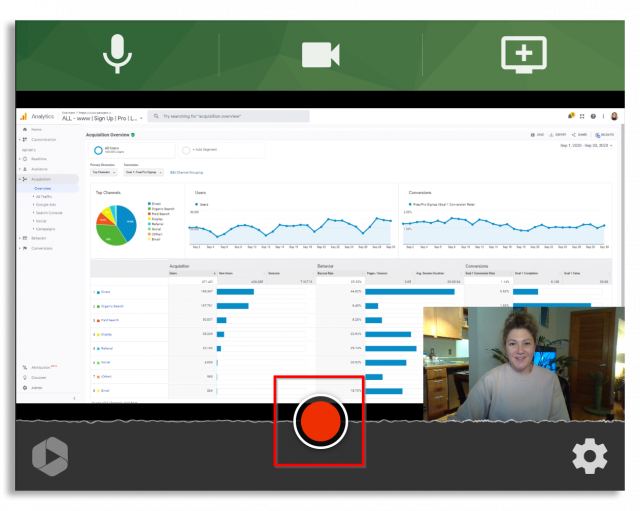
5. Press the Record button and begin presenting along with your screencast
Saving and Sharing Your Screen Recording
After you’ve completed your screen recording, you have the option of downloading your recording and saving it to your computer, uploading it directly to YouTube or Google Classroom, or you can send it to Panopto.
Record your screen with Panopto Express, a free online screen recorder.
Share instantly through YouTube, Google Classroom, or anyway you prefer.
No free trial limitations. Nothing to install. No user account or credit card required.