- Academic Technology
4 Tips for Recording HiFi Lecture Videos
Starting in the 1950s, audiophiles and equipment manufacturers started experimenting with recording and playback technology to bring the experience of listening to live music into the home. For almost half a century, HiFi (or high fidelity) was the gold standard for audio quality — a promise that listening to the recording was the next best thing to really being there.
Of course, as the recording industry has turned its focus from quality to portability, HiFi has faded from the music world. But that’s not to say HiFi is gone completely — it’s just found a new home.
Today, the quest for High Fidelity isn’t one only of sound, but of experience. Specifically, video is increasingly produced not merely with the goal of providing a “back of the room” view, but to share an event in a way that enables the viewer to feel as though they were sitting in the front row.
Athletics on campus may be the model of video production that seeks to make the sofa the best seat in the house but, as TED has shown, may be none more important (or growing more quickly) than lecture capture.
Capturing The Best Lecture Experience
Lecture capture began in an environment where anything was an improvement over the old system of “you just had to be there.” Early on, systems required dedicated media racks and specialized cameras at the back of the auditorium. For all that expense (and assuming everything worked as it should), students received a basic enhancement to their learning experiences — the ability to revisit past lectures on-demand when studying.
But as every teacher knows, the back of the class is hardly the ideal vantage point.
High fidelity for lecture capture today is all about how accurately the classroom experience can be reproduced in the recorded format. Lecture halls aren’t TV soundstages. A fixed camera at the back of the room is better than nothing, but to capture a class in HiFi, instructors need flexibility, the right cameras, and the right software for the job.
The good news is that cameras of all types are now cheaper, higher quality, and more accessible than ever. When connected to video recording software, these cameras can record lectures, labs, and more from the best vantage point (or points) in order to produce the highest fidelity experience possible.
Here are just a few of the multi-camera video recording setups that instructors can use to bring their recorded classes to life in the new HiFi.
1. Make it feel like the instructor is right there
Lecture halls are big, sometimes dark, and full of people. As a result, single, fixed-camera lecture recording solutions can produce an on-demand video that is noisy, out-of-focus, or obstructed. And if the classroom features a projector or another large screen, it’s possible that the recording may be both too dark and too bright at the same time.
Fortunately, there’s an easy solution: record the presenter separately from the presentation.
By framing up the instructor in their own video feed, the camera can be set to the specific lighting conditions of the lecture stage, freed from the glow of the projector, students’ tablet and laptop screens, and people getting up in the middle of the lecture.
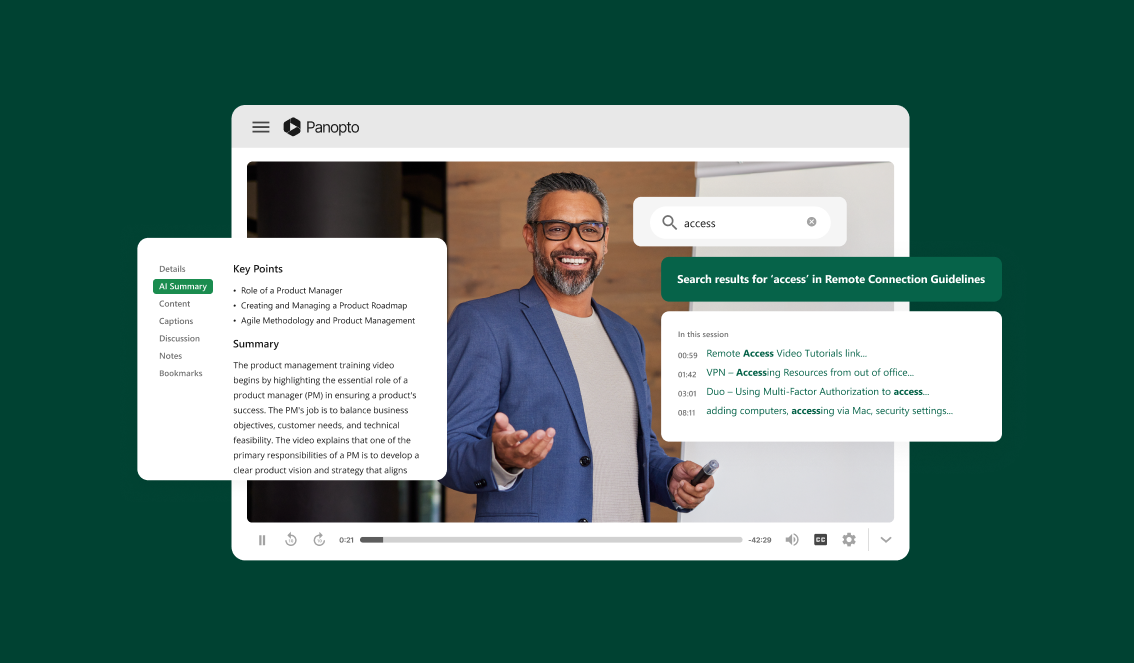
A modern video platform like Panopto enables academic technology teams to capture any and every part of the classroom as they see fit. There are many options for online screen recording in high-fidelity:
- Using multiple cameras: Capture video of the lecturer from multiple angles. A modern video platform can record multiple feeds simultaneously and automatically sync them, creating a professional-quality experience using commodity webcams or camcorders.
- Leveraging a camera operator: Get a tripod with a pan/tilt handle and enlist a student worker to sit in front and track the instructor as they speak, or use a motorized PTZ (pan-tilt-zoom) camera that can be operated remotely.
- Automated tracking camera: A relatively new option is to use a special motorized tripod that automatically tracks the lecturer through the use of a wearable beacon or motion sensors.
Of course, the setup can always throw in a wide angle shot. While not ideal for the majority of a presentation, they can help establish the scene and serve as a backup for the other cameras if the instructor should somehow manage to step out of frame.
2. Get up close for physical demonstrations
Many lectures are simply oral presentations. However, courses in science, engineering, art, and other fields regularly include demonstrations as part of the classroom experience. These are often well-served by having an extra recording device dedicated to capturing those activities.
Cameras come in all shapes, sizes, and functions, and can be especially valuable for lab and other physical demonstrations.
- External webcams: available for less than $100 US, make it possible to shoot multiple angles from tabletop tripods or handheld.
- Specialty cameras: mounted to microscopes and catheters, make it possible to show a level of detail not possible even in a live, up-close demonstration.
- Wearables: like Google Glass, allow students to see what their instructors see.
- Document cameras: can provide a hassle free camera and stage for a table top demo.
Using these tools in combination gives instructors new options for a much higher fidelity lecture capture experience.
Watch a lab demonstration recorded with Panopto:
3. Share slides and computer screens in crystal clarity
Though they represent one of the most ubiquitous visual aids in education today, far too many institutions record slides and other information presented on a computer screen by projecting those materials to a standard screen, then using a camcorder to capture that screen. The issue is only compounded when the lecturer then stands in front of the projector while teaching.
The harsh contrast between the brightness of the presentation and the darkness of the lecture hall makes it difficult for a camera to record both subject and slide presentation in a single frame, limited by the camera’s dynamic range. Because the camera is unable to record both bright and dark with the same settings, it must attempt to choose one or the other, or flicker back and forth between the two creating a visually distracting recording.
Lecture capture software has the ability to flawlessly capture the slides from the original file in a way that is easier and produces a higher quality, more legible image than a recording of an auditorium screen. And since screens are digital, there’s no limit to the number of screens the presenter can record, leaving space for demos, slide presentations, or multiple presenters.
4. Make student discussions part of the recorded experience
Although it’s called lecture capture, that doesn’t mean that instructors spend all of their time talking at their students. Interactive participation and student response remotes are now mainstays of the interactive lecture hall. More recently, tiered classrooms have blurred the lines between small group discussion and formal lecture, allowing classes to flow freely back and forth between instructor presentations and active learning activities. While an instructor could choose to simply snip out those pauses in the lecture recording, a HiFi experience would acknowledge student interaction as a key component of the classroom experience.
Here again, a fixed wide angle lens isn’t typically enough to capture student interactions in a lecture hall. Even if the recording could see the students, capturing the right audio from a room full of people presents its own set of challenges. Flexible lecture capture gives instructors the ability to have students contribute video to the lecture from the smartphones and laptops at their desks, or pre-recorded videos captured outside of class. With distributed recording, universities can even set up additional cameras to capture student questions or discussions. With the right permissions from the students, the instructor can highlight his or her favorite student responses in the class recording, make each breakout discussion available for class review, or opt to keep them private for use in evaluation.
Panopto Is High Fidelity Lecture Capture
Panopto was borne out of the computer science department of Carnegie Mellon University and was built specifically to simplify high fidelity lecture and presentation recording. Our multi-camera video recording software can be installed on nearly any Windows or Mac and connect to almost any camera, microphone, or specialty recording device. By connecting laptops and mobile devices, you can use Panopto as an infinitely scalable recording solution, capturing a nearly limitless number of inputs together while keeping everything automatically synchronized.
Try Panopto Express, our free screen recorder that works right in your browser. You don’t even have to sign up. Record a lecture with Panopto Express >>
We Wrote The Book On Recording Lectures
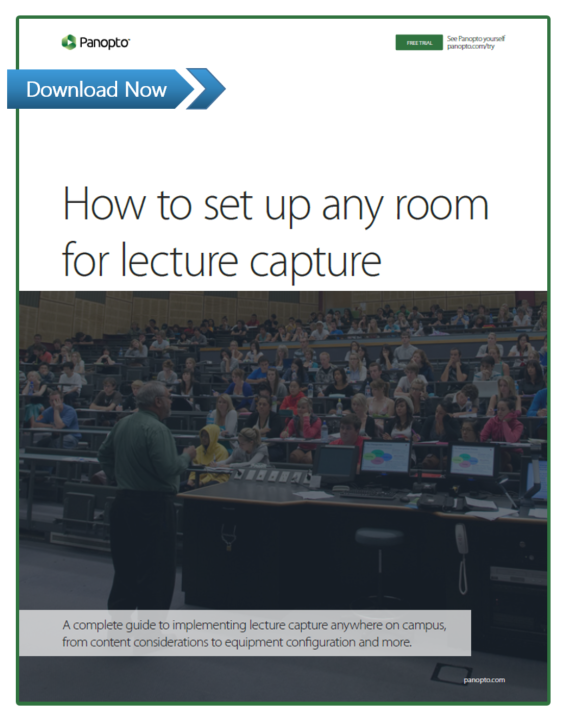 Whether you’re looking to set up lecture capture in a few classrooms or you want to enable video capture anywhere on campus, our latest e-book will guide you through considerations for different spaces and uses, as well as your recording equipment options. We even diagram some of the most common lecture capture setup examples.