- Academic Technology
The Complete Lecture Capture Equpiment Guide
With today’s lecture capture systems, virtually any room can be provisioned for video with a simple flick of a switch. From large auditoriums to smaller classrooms, or from dedicated labs and practice spaces to faculty offices, creating a baseline video capture setup can be as easy as downloading the appropriate software to a computer and plugging a camera into a USB port.
That, however, doesn’t mean that lecture capture can or should be deployed the same way in every instance. To get the best results, you’ll want to plan for the practical realities of recording in each room you provision.
Last week, in Part I, we addressed lecture capture setup considerations for where and what you’ll be recording. This week we dive into the AV equipment you’ll need and technical considerations that should help you choose the right tools for particular rooms and uses. If you’d like to read our guide in its entirety — or you simply prefer the e-book version — you can download our 50+ page guide to setting up lecture capture anywhere on campus here.
What Equipment Will You Need For Recording Lectures?
SECTION 1: Lecture Capture Computers
SECTION 2: Video Recording Equipment for Lecture Capture
SECTION 3: Audio Recording Equipment for Lecture Capture
SECTION 4: Lecture Capture Accessories
When it comes to lecture capture equipment, the basics are simple. You’ll need a computer configured for lecture capture, as well as audio and video recording devices that will feed into the computer.
While lecture capture software enables instructors to record basic video content with just a laptop or mobile device, most colleges provision their classrooms on campus with a fixed lecture capture system. These systems provide teachers with a ready-made recording environment, in which faculty simply walk in, plug in, and hit record. The lecture capture system ensures consistent quality in the classroom videos, and minimizes the need for presenters to learn and tweak potentially complex in-room AV setups.
Below, we compare options for the backbone of your lecture capture setup — building a lecture capture computer versus buying a rack-mount lecture capture appliance. We’ll then dive into specific features you should consider when selecting peripherals such as video cameras, microphones, capture cards and other accessories for your setup.
1. Lecture Capture Computers
At the core of an in-room lecture capture system is a lecture capture computer that runs video capture software and grabs AV feeds from connected classroom devices. A lecture capture computer can either be a customized desktop, or it can be purchased as a plug-and-play rack-mount appliance. We’ll discuss the benefits of each approach, but first let’s look at the components that typically go into a lecture capture computer.
What Goes Into a Lecture Capture Computer?
A lecture capture computer is typically a midrange to a high-end computer with video capture software installed and the proper ports for capturing and syncing AV feeds.
Typically, a lecture capture computer will have the following components:
- A midrange to high-end microprocessor
- Large internal storage capacity to support the storage of video files
- Ethernet connectivity
- USB 2.0, 3.0, or 3.1 (Type-C) ports
- Video-in ports (some combination of HDMI, DVI, SDI, VGA, and analog)
- Video-out ports (typically HDMI, DVI, DisplayPort, or VGA)
- Audio-in and out ports for mics and line audio
Your choice to either use customized desktop computers, or to purchase rackmount appliances, will depend greatly on the following:
- Your existing infrastructure
- Your budget
- Your desire to upgrade as technology changes
Option 1: Customizing Desktop Computers
Customizing an off-the-shelf desktop computer is typically the most flexible solution and generally comes at a lower cost. The tradeoff is usually your team’s time, as you’ll need to set up each computer individually.
A few key considerations:
Existing equipment:
Many classrooms are already equipped with a computer that can be provisioned for lecture capture with a few relatively simple upgrades. In most cases, adding video capture software and potentially upgrading the video capture card will generally be more budget-friendly than making a switch to rack-mounted appliances.
Budgeting:
You can usually build or upgrade existing desktop computers for under $1000 each.
Upgrade Flexibility:
Given the rate at which video technology can change, a customized desktop often gives you more flexibility to upgrade the operating system, drivers, desktop applications, memory, hard drive, video cards, and other internal components.
Option 2: Buy Rack-Mount Appliances for Lecture Capture
Purpose-built, rack-mount lecture capture appliances come ready out of the box, so setup is usually quick and easy. While it is typically a more expensive option than a customized desktop, some rack-mount appliances can be just as flexible and may fit better with your existing AV setup.
A few considerations for provisioning classrooms with purpose-built appliances:
Existing Infrastructure:
If your classrooms are already provisioned with rack-mounted equipment, purpose-built lecture capture appliances will often be preferred. In cases where the rack is in an adjoining room, be sure to plan for cable logistics and signal boosters, since video, audio, and data cables can suffer from signal degradation at longer lengths.
Budgeting:
Purpose-built video capture appliances typically cost anywhere from $3,000 to $20,000 each. The specific features included in an appliance will vary by vendor, so be sure to have your solution provider detail the specifications of the processor, hard drive, video and audio capture capabilities, video and
audio output options, and automation and remote control capabilities.
Upgrade Flexibility:
Most modern lecture capture appliances are based on the Wintel architecture, making it straightforward to upgrade the operating system, memory, hard drive, and other internal components. Other appliances are built using embedded systems that cannot be easily modified. This typically limits the lifespan of the device, or at a minimum, requires you to ship outdated appliances to the lecture capture provider in order to receive an upgrade. In addition to the time required to ship the appliance and the resulting downtime of your lecture capture system, these trade-in upgrades also often come with an increased annual maintenance cost.

The Panopto-Certified Video Capture Appliance by Seneca
Option 3: Utilizing Faculty Laptops for Lecture Capture
In the absence of a dedicated video capture computer in the classroom, a lecturer can install lecture capture software onto a personal laptop and then connect AV equipment, such as a camera, microphone, and an external capture card.
This is a quick and flexible setup option that can be scaled to many classrooms, but the presenter will need to be able to connect peripherals and have a functioning knowledge of how to use your lecture capture software.
>> Remote Recording And Scheduling
 One software-based lecture capture feature can make recording remarkably simple for both presenters and the AV team — remote recording. If your lecture capture software provider offers this feature, your technical team will be able to schedule and manage your lecture recordings from anywhere with a web browser or smartphone.
For faculty and non-technical presenters: A mobile app with a remote control interface turns any smartphone into a secure touch panel for controlling in-room AV gear. This interface standardizes the controls for different devices in different classrooms on campus. It’s the perfect solution for anyone who has avoided recording lectures because they weren’t sure how it all worked.
For your AV team: Remote recording has the potential to reduce workloads, giving them the ability to schedule recordings in specific classrooms in advance. With just a few clicks, you can securely schedule a single event or a recurring weekly lecture for the entire semester. You can even control how the recording is captured by selecting video sources, setting the recording quality, and even choosing to live stream the recording or not.
Additionally, AV teams can use the remote recording feature to securely monitor recording status, preview live recordings, and check audio levels. From one remote location, you can check the status of recordings all across campus to make sure scheduled recordings are going as planned.
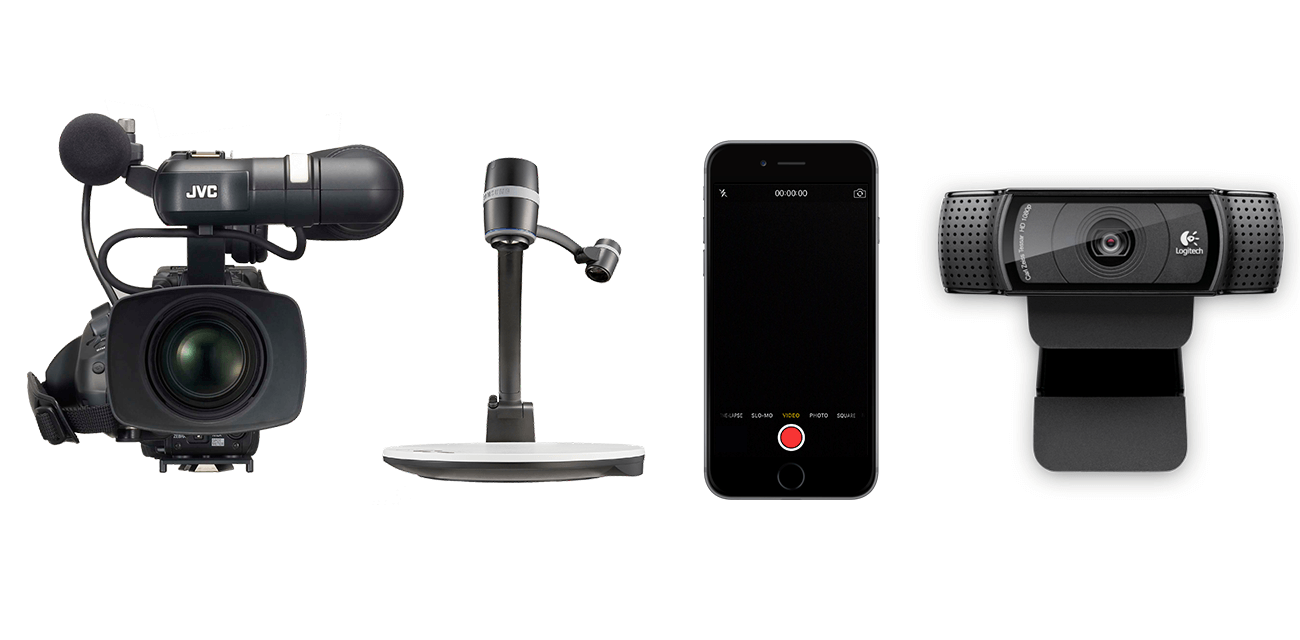
2. Video Recording Equipment For Lecture Capture
In an ideal world, a single camera model would meet the requirements of every learning space.
This perfect, all-in-one camera would support pan, tilt and zoom (PTZ) to accommodate the size and setup of any classroom. It would deliver smooth, broadcast-quality video in different lighting conditions. It would have a small form factor to fit on a podium or discreetly mount to the wall. Its cost wouldn’t prohibit you from buying one (or more) for every classroom across campus. And of course, it would plug directly into a standard USB port to eliminate the need for video capture cards. You could buy this all-in-one camera in bulk to receive significant discounts, and you could save time by provisioning the same camera model in every learning space.
Of course, this camera doesn’t yet exist, although we can see glimpses of this future through recent advances in 4K, 60 frames-per-second (fps) USB webcams and smartphone cameras.
Until the all-in-one camera arrives, you’ve got choices. Fortunately, where budgets are concerned, the cost of the highest-quality cameras has dropped significantly in recent years, and the capabilities of even the most inexpensive devices have risen considerably.
You’ll find that the “best” camera(s) will vary by classroom, based on the room size, available lighting, existing infrastructure, course-specific demands, and presenter logistics. For example, a high-end PTZ camera may be your best choice for a large lecture hall frequently used for guest presentations and live events, while a consumer-grade camcorder or even webcam may suffice in some smaller classrooms.
As you consider your options for each learning space, keep in mind that the goal of any lecture capture camera is to reproduce the classroom environment with high enough fidelity to improve the student viewing experience. When thoughtfully provisioned, video cameras help students feel as though they’re in the room even if they’re watching from miles away.
Let’s look at the major categories of video cameras on the market, compare their relative strengths, and discuss why you might select one over another for any given space.
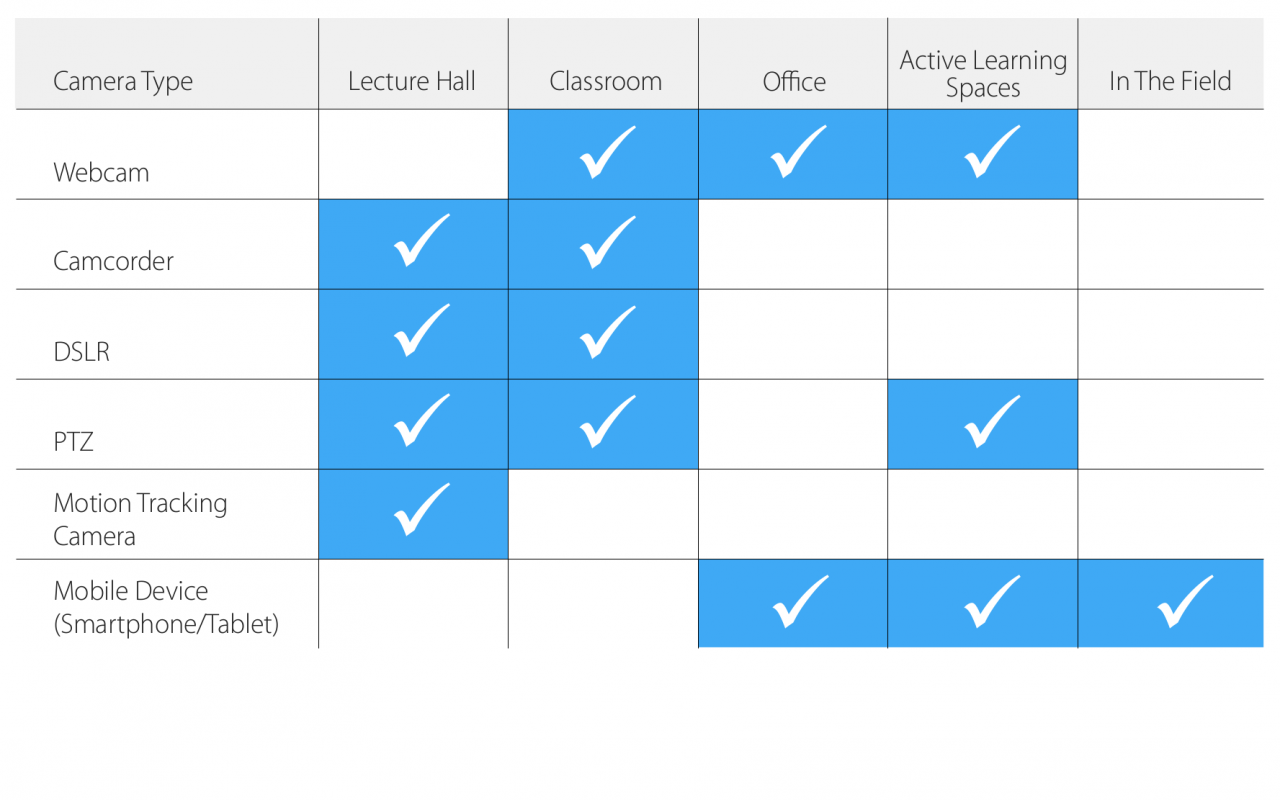
Webcams | Camcorders | DSLR Cameras | PTZ Cameras | Motion Tracking Cameras | IP Cameras | Mobile Devices | Specialty Cameras
Webcams
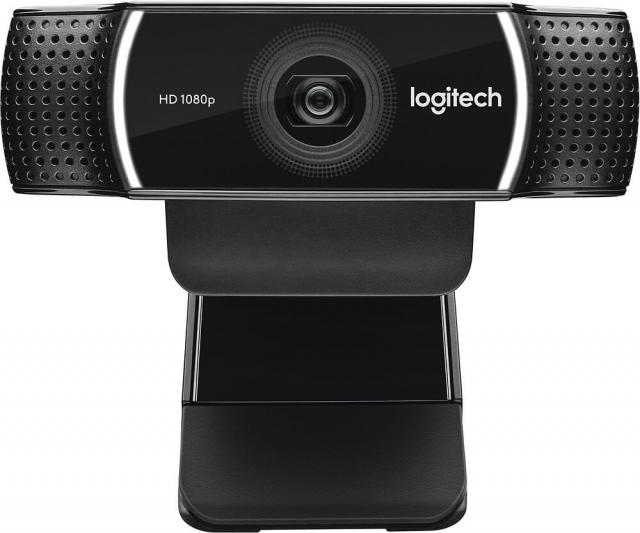 Webcams are compact video cameras that are either built into a laptop or connected externally via a USB connection. Webcams have become remarkably powerful in recent years, with models like Logitech C922 supporting 60fps and Logitech Brio supporting up to 4K resolution. Many webcams will also record audio, although the quality of audio captured currently varies greatly from
model to model.
What They’re Good For
Webcams can produce smooth, clear video in smaller, well-lit spaces. These affordable cameras are ideal for a lecturer recording herself in a small room or office setting with ample lighting.
What They’re Not Good For
The small sensor in a webcam will not handle diverse lighting scenarios well. Low lighting will introduce noise and choppy video, and backlighting will generally underexpose the presenter. You also won’t get the same depth of field (DOF) as you would with higher-end cameras if you’re looking for a more professional-looking recording. Webcams are not recommended for large lecture halls, although they can work as a baseline solution in smaller, well-lit classrooms.
Price Range
A quality USB webcam for lecture capture will typically cost between $30 and $100. This budget-friendliness also makes USB webcams the perfect video tool for flipped classrooms, and an ideal supplemental video source for capturing close-ups of whiteboards or in-class demonstrations.
Camcorders
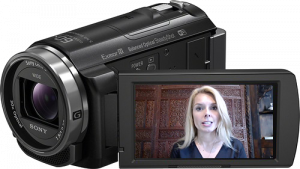 Portable video camcorders, like the Sony Handycam or Canon VIXIA series cameras, will have more features and higher-end capabilities than a webcam. Camcorder lenses typically provide zoom capabilities anywhere from 8x to 60x. These cameras also have larger sensors and wider dynamic ranges than webcams, performing better in low-light situations. And camcorders typically
provide greater control over white balance and exposure to help ensure the consistency of your recordings.
What They’re Good For
Mounted on a tripod, wall, or ceiling, or even using a camera operator, camcorders are good for recording lectures in most standard classrooms and lecture halls. These cameras will give you high-quality video with the flexibility to zoom in on a presenter from a distance.
What They’re Not Good For
Camcorders offer a lot of range and versatility, but they’re overkill for traditional flipped classroom recordings. For example, faculty recording themselves in an office setting won’t need this type of camera (and will likely prefer to use something less complex). In addition, camcorders don’t provide the ability for AV teams to remotely control the panning, tilting and zooming. This may make camcorders less attractive as a wall- or ceiling-mount option for large lecture halls.
Price Range
A quality, consumer-grade camcorder for lecture capture will typically cost between $300 and $1000. For many institutions, this will be the right mix of recording quality and price, and will be the go-to option when provisioning new rooms. For even greater quality, higher-end, professional camcorders, like the Sony HXR-NX100 or the Canon XF200 HD typically list between $1000 and $3000.
Along with the camcorder itself, it’s likely you’ll also need to invest in a capture card in order to connect the camcorder to your lecture capture computer. Check out our section on Connecting Video Recording Devices to Lecture Capture Systems for more details on capture cards.
DSLR Cameras
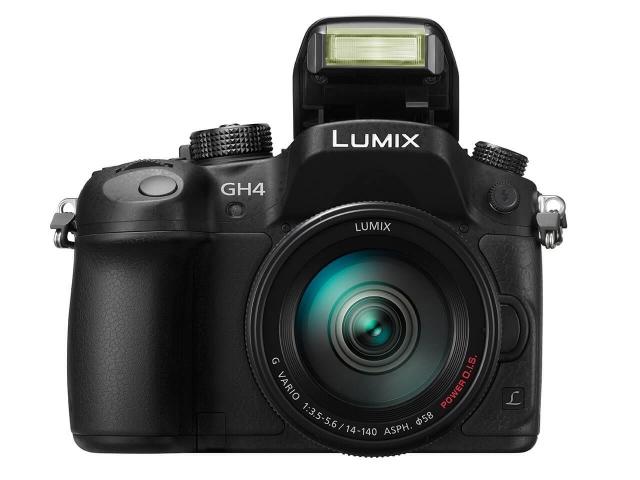 Digital single-lens reflex (DSLR) cameras made their name in still photography, but in recent years, they’ve also become a contender for high-quality video capture. These interchangeable-lens cameras sport significantly larger sensors than camcorders, making it easier to capture high-quality video in difficult lighting conditions, and to achieve more cinematic depth of field.
What They’re Good For
DSLRs can produce incredibly high-quality, professional-looking video. They can be set on a tripod or mounted to the wall or ceiling in fixed setups to record lectures and guest presentations. They also make for excellent recording studio cameras.
What They’re Not Good For
DSLRs are unique beasts. Their zoom range generally ranges from 4x to 10x, less than that of many camcorders. So they’re not ideal for the largest of lecture halls. In addition, most DSLR lenses don’t zoom smoothly, and like camcorders, their pan and zoom capabilities can’t be controlled remotely. As a result, they often aren’t the best choice for camera operators. And due to their price, DSLRs are overkill for most small classrooms.
Price Range
A quality 1080p or 4k DSLR camera with a full-frame sensor and interchangeable lens can cost between $1,200 to $3,000 (additional lenses typically cost extra).
PTZ Cameras
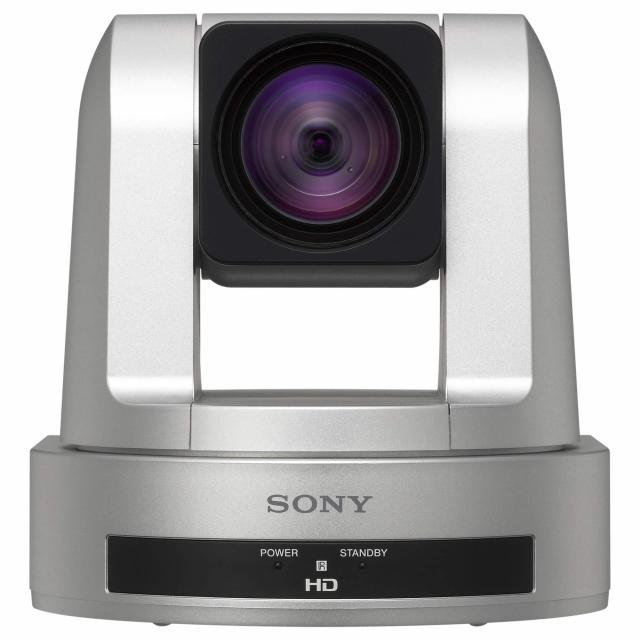 The defining characteristic of pan-tilt-zoom (PTZ) cameras is their ability to have their direction and zoom controlled remotely. Cameras such as the Sony SRG-120DH and SRG-300H are meant to be wall- or ceiling-mounted and then controlled by a wireless remote, room AV control system (like Crestron), or joystick controller. These cameras have large zoom ranges, and most newer PTZ models capture excellent-quality video in 1080p at 60fps.
What They’re Good For
PTZ cameras can be used in almost any classroom or lecture hall. Their remote control makes them ideal for important events and guest presentations in large auditoriums where a camera operator is required. They also offer a lot of flexibility for recording in multi-purpose rooms, labs, and simulation spaces.
What They’re Not Good For
These cameras can be overkill for small classrooms, both in terms of their cost and capabilities. And with their fixed setup, PTZ cameras aren’t meant to be used outside traditional learning spaces like classrooms, auditoriums, and labs.
Price Range
A quality PTZ camera will range from about $1,200 to $3,300. You may need to purchase a remote controller in addition to the camera in some cases, so be sure to factor that into the total cost for these cameras.
Motion Tracking Cameras
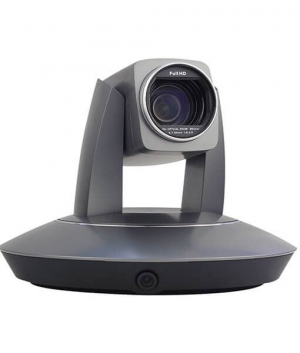 Motion tracking cameras, such as the iSmart Lecture Tracking camera (LTCA2001N), are innovative PTZ cameras that can automatically follow a presenter as he or she moves, without the need for an operator to manually pan the camera during a recording. The iSmart camera uses facial recognition and motion detection technology to follow the presenter moving about the front of the lecture hall.
What They’re Good For
Motion tracking cameras are built for larger lecture halls where the presenter has room to walk around. By following the presenter, these cameras typically capture a tighter field of view. This creates a more engaging shot of the lecture compared to a wider field of view that captures the full presenting area or stage.
What They’re Not Good For
This technology comes with a high price point, so it won’t be ideal for many standard classrooms and lecture spaces. Likewise, if your room limits space presenters have to move about, or if your instructors just tend to stay put behind a podium as they present, there will be little value to be found in spending more on this technology.
Price Range
The iSmart Lecture Tracking camera starts at $6,000.
IP Cameras
An IP, or internet protocol, camera can send and receive video over a local network or the internet. This type of camera is most commonly used for security and surveillance, and was a common choice in some early lecture capture installations. IP cameras installed as part of your security infrastructure can sometimes be repurposed or reconfigured to also support lecture capture.
What They’re Good For
When available, repurposing or updating IP cameras can save you from purchasing new cameras when provisioning a space that already has these devices installed. You will first need to check that your existing IP cameras are compatible with the lecture capture software you’re using. Then, there will typically be a bit of extra setup to install drivers that enable your lecture capture software to recognize these cameras.
What They’re Not Good For
IP cameras are not recommended for new lecture capture installations. There are generally higher quality camera options at lower price points that are easier to set up for lecture capture.
Price Range
IP cameras can range from a couple hundred dollars to a couple thousand dollars, depending on their features. Models that have higher resolution, flexible pan, tilt and zoom capabilities, and other high-end features will typically cost over $1000 each.
Smartphones and Tablet Cameras
 Most people today already have a device in their pockets that can record course content — their smartphones. High-end smartphones and some tablets have the ability to record high-quality video at up to 1080p and 60fps with image stabilization. These devices have made new use cases for lecture capture possible, from in-the-field recording to multi-camera captures of demonstrations, and more.
What They’re Good For
Smartphones and tablets can take lecture capture outside the traditional classroom into the field, the lab, or into student breakout spaces. These devices are perfect for ad hoc recordings and capturing multiple (sometimes tricky) viewpoints in a demonstration. Widely available with students as well, they can also be the perfect tool for recording student presentations, projects, role-plays, and other video-based assignments.
What They’re Not Good For
Typically, smartphones and tablets are not used as the primary video capture source in fixed classroom setups. For example, you wouldn’t provision a classroom for lecture capture with an iPad mounted at the back of the room, as mobile devices have limited battery life and often lack sufficient onboard storage for large video files. You would, however, use a mobile device to capture video from another viewpoint during a demonstration or presentation in class.
Price Range
Mobile devices vary widely in price depending on the brand, model, and features. If buying from a standard retailer, you can expect to pay anywhere from about $200-$800 for a mobile device with good video capabilities. Your institution may have the power to buy a large quantity of devices at a discount or you may already have many of these devices available for use on campus. And of course, in many cases, most of your faculty will already have their own tablets and smartphones that can record and publish video to your lecture capture software via a mobile app.
Specialty Cameras
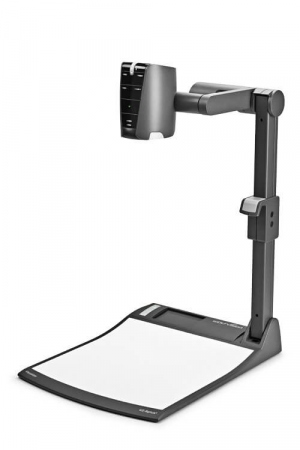 Specialty cameras expand the type of content that faculty can include in their recorded lectures. These cameras typically capture feeds that are secondary the presenter video and their on-screen content. So check that your lecture capture software is capable of capturing video from multiple sources. Below are some of the most common examples of specialty cameras:
Document cameras:
A document camera can be used to display print materials or real-world objects. You can also use document cameras to capture the screen on a smartphone, which can be useful for demonstrations.
Microscopes:
Video microscopy can be captured in several ways. Newer digital microscopes provide direct video out via USB or HDMI. And traditional compound microscopes can be fitted with a smartphone adapter to capture video via mobile lecture capture apps.
Interactive whiteboards:
Rather than simply pointing a camera at a whiteboard to record, a variety of technology-enabled interactive whiteboards can now be connected to a lecture capture system and recorded much like a secondary computer screen. Interactive whiteboards capture the content instructors write on them using a number of different methods — infrared scanning, resistive touch, and electromagnetic or ultrasonic markers are all common. Check with your lecture capture system provider for specific setup recommendations.
Specialty scientific instruments:
There is a broad range of medical and scientific equipment that faculty may want to present in lecture video. Mobile and multi-camera recording features will allow for many non-conventional video capture scenarios, but check with your lecture capture system provider for specific setup recommendations.
>> Connecting Video Recording Devices to Lecture Capture Systems
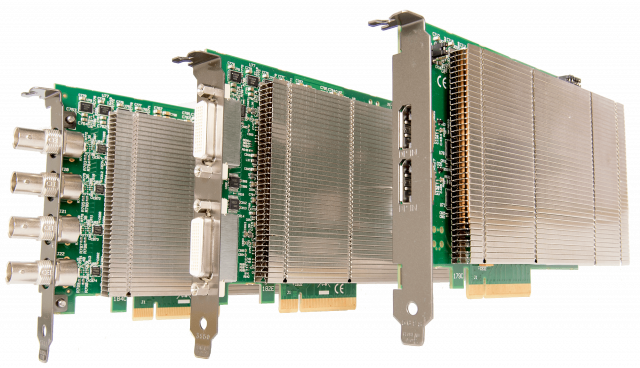 Different cameras provide different ways to stream video from the device to the lecture capture computer. Webcams, some PTZ cameras, and an increasing range of specialty recording devices make it simple by using USB 2.0 or 3.0 connections. Whether you’re using a laptop, a desktop, or a rack-mount appliance, these devices typically just plug-in and work.
By contrast, camcorders, DSLRs, most PTZ cameras, and many specialty cameras send video to the lecture capture computer over HDMI, SDI, DVI, VGA, component, or composite connections. These require either an internal or external video capture card to convert the feed into a format that can be recognized by the computer as a video source.
For rack-mount appliances and most desktop computer setups, an internal video capture card makes the most sense. These cards typically provide single, dual, or quad inputs for video, with options for all of the typical video interfaces.
For laptops, internal video capture cards aren’t an option. Instead, external capture cards (sometimes called capture dongles) can accept incoming video from the camera and convert it to USB. These converters are available for HDMI, SDI, DVI, VGA, and analog video sources.
In just the last few years, USB 3 video capture cards have begun to change the face of high-quality video recording and live streaming. An AV setup that once cost thousands of dollars and required complex, specialized appliances can now be achieved with an existing midrange laptop and a $300 dongle.
Want to know more? Read our overview of USB 3 video grabbers.
Distributed Recording
Some lecture capture systems provide a capability called distributed recording (also known as multi-machine recording).
With distributed recording, you can use separate web-connected lecture capture computers and/or mobile devices to capture multiple video and audio feeds. These feeds are automatically synchronized on the lecture capture server or in the cloud with no hard-wiring or other physical connections necessary.
Benefits of Distributed Recording
- Larger rooms with complex setups no longer need hundreds of feet of cable to connect every device and computer together
- Record from multiple video sources without a centralized mixer
- Reduce the need for video signal converters
- Can be used for live and on-demand webcasting
- Record and sync streams from different locations and networks
- Record and sync from multiple mobile devices
For more, check out our detailed video review of distributed recording.
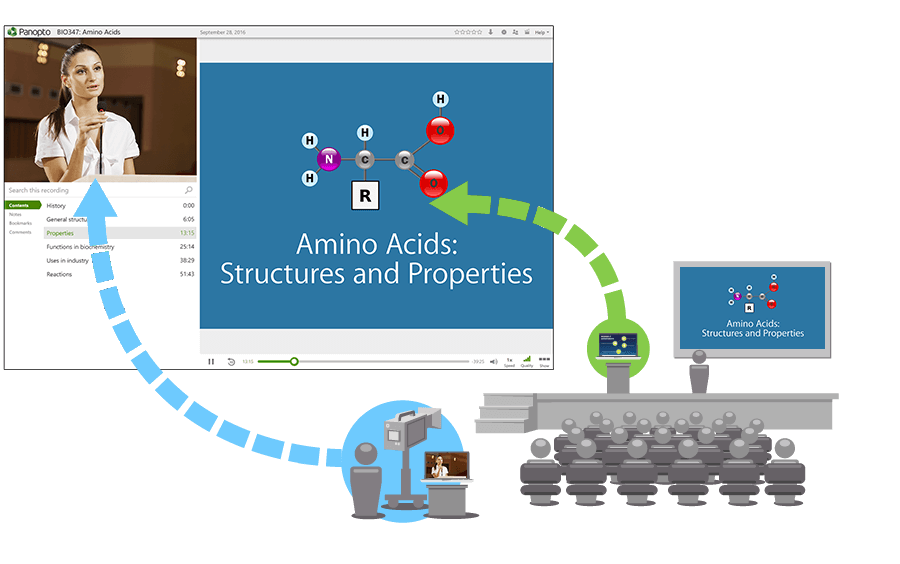
Distributed recording simplifies in-room recording setup by using separate computers to capture different aspects of the lecture.
In this example, slides are recorded using a laptop at the front of the room, while the presenter is recorded using a camcorder and laptop in back.
 3. Audio Recording Equipment For Lecture Capture
There’s a simple secret to getting the most out of your lecture capture tools, and it’s this: your audio matters twice as much as your video. When students can hear crisp, clear audio of their instructors in a recording, poor video quality may still be a distraction, but one that can often be overlooked. By contrast, broadcast quality video is for naught if the audio is garbled or otherwise unintelligible. Without a quality talk track, students will rarely find a recording useable.
Fortunately, the same trends that have made video recording devices more accessible and affordable in recent years have also been at work with audio devices. Today, institutions will find a plethora of easy and inexpensive devices. Let’s take a look at what’s available, what each does well, and why institutions might select one over another for any given space.
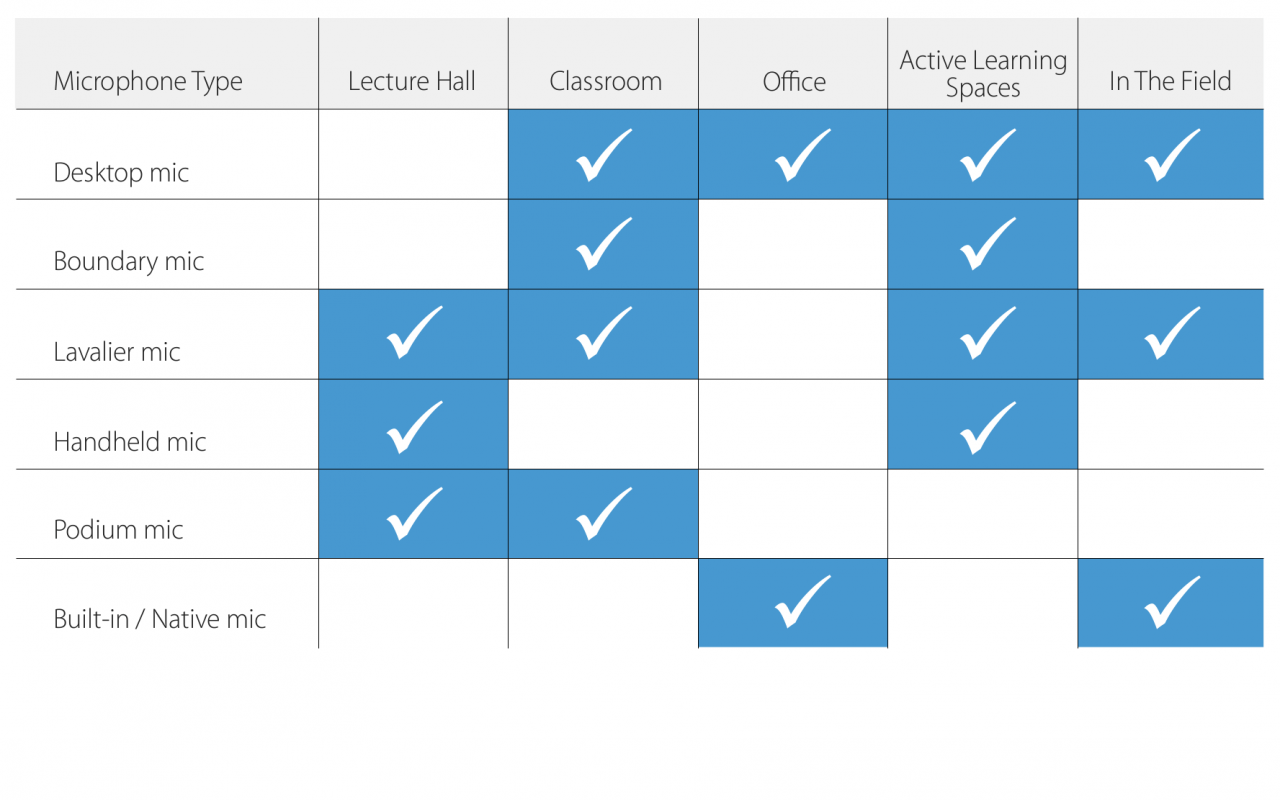
Desktop Microphones | Boundary Microphones | Lavalier Microphones | Handheld Microphones | Podium Microphones | Built-in Microphones
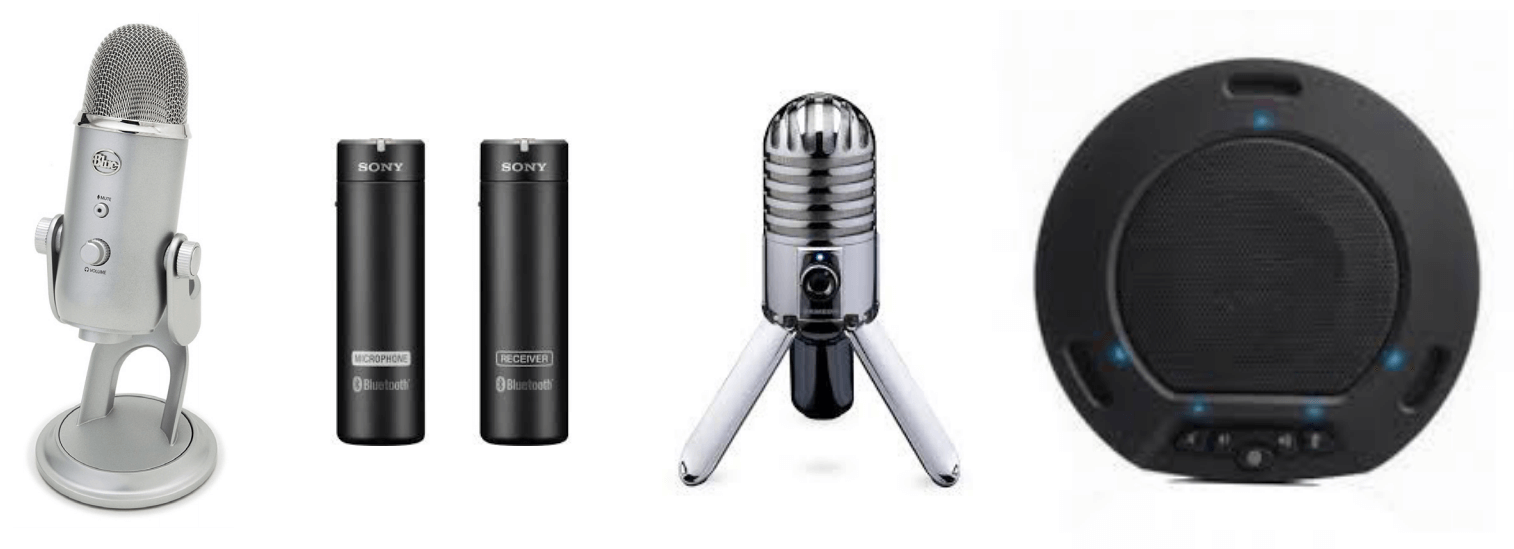
Desktop mics
 Desktop microphones are designed to sit on top of a table or podium, near the presenter.
What They’re Good For
Desktop microphones will produce excellent sound when they are positioned directly in front of a stationary lecturer. Desktop mics are recommended for quiet office spaces or at a podium where a lecturer will be standing.
What They’re Not Good For
These microphones are not very good at reducing background noise. You’ll need to ensure that desktop mics will be positioned close to the person speaking, and that they’ll generally be used in quiet spaces. A noise-canceling microphone shield can help reduce background noise if you already have desktop microphones you want to use. For presenters who like to move around, these are not ideal.
Price Range
A quality desktop microphone will cost between $50-$150.
Boundary mics
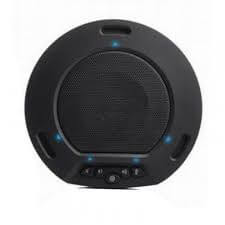 A boundary microphone is a small, omnidirectional mic that sits flat on a surface, such as a table or mounted on a wall. The boundary mic is designed to pick up sound that reflects off the surface on which it is mounted or positioned.
What They’re Good For
Boundary mics are good for recording seminar-style courses in small rooms or smaller discussion classes. These small, unobtrusive mics can also be used as a fail-safe for fixed lecture capture setups. The quality won’t be as good as other microphones, but in case a lecturer forgets to use or turn on another primary microphone source, a boundary mic will capture acceptable audio
most of the time. Note that, in this scenario, you’ll need to add an audio mixer to pull the extra audio feeds into your lecture capture system.
What They’re Not Good For
If you are aiming for optimal sound quality in your recordings, you should not use a boundary mic as your primary audio recording device.
Price Range
A good boundary mic will range from about $50 to $100.
Lavalier mics
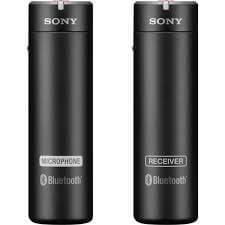 A lavalier microphone (also commonly referred to as a lapel mic, clip mic, body mic, or lav) is a small, hands-free microphone that can be worn by the presenter, and which will capture high-quality audio even as he or she moves around. The microphone plugs into a wireless transmitter that the presenter wears on a belt or waistband, and the transmitter sends the audio feed to a receiver that will need to be connected to your lecture capture system.
What They’re Good For
Because they are worn by the lecturer, lavalier mics are good for capturing crisp, clear audio of a single presenter in most scenarios. There are even lavalier mics that plug directly into a smartphone or tablet, so they can be used for recordings both in the classroom and in the field.
What They’re Not Good For
These wireless systems typically require slightly more setup than other hardwired microphones, as the transmitters and receivers will need to be set up on matching frequencies. Lavalier mics also have a tendency to eat through batteries. Rechargeable options are available, but you’ll need to ensure they are placed on the charger when not in use. It is a good idea to set up a room with at least two lavalier mics in case the primary lav mic isn’t functioning.
Price Range
Wireless lavalier microphone systems will start around $100 and can run upwards of $1000 for rechargeable systems.
Handheld mics
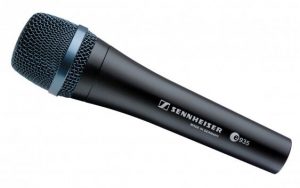 Handheld microphones are traditional microphones that a lecturer holds and speaks into directly. These can be wireless or wired into your lecture capture or AV system in a classroom or lecture hall. They are available with a range of capabilities and audio capture patterns (otherwise known as polar or pickup patterns, detailed below), and depending on the quality the cost can also vary quite a bit.
What They’re Good For
Handheld microphones can be a smart a backup for lavalier microphones that may not be charged or may otherwise not be working. They are also ideal for recording quality audio of audience questions. If you want to capture a Q&A session after a presentation, you will definitely want to have one or two handheld mics connected to your lecture capture system.
What They’re Not Good For
As a primary microphone source, handheld microphones tend to get in the way when a presenter is lecturing or giving a demonstration — particularly if the presenter is also clicking through supporting slides. A presenter may also get tired of holding a microphone for the entirety of their lecture. Wireless handheld microphones can also cause similar headaches to lavalier mics when they eat through batteries.
Price Range
Handheld microphones range from around $40 to around $300 each. Note that with wireless handhelds, the mic is just the transmitter. You’ll also need to purchase a separate wireless receiver that then plugs into your lecture capture computer. And depending on the microphone, audio XLR cables may not be included, which could further increase your cost per unit.
Podium mics
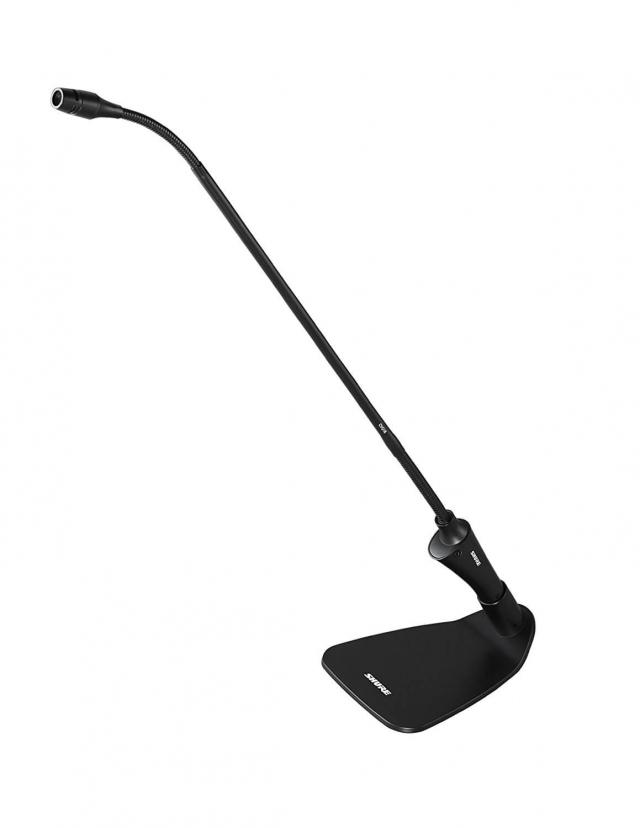 Podium microphones, or gooseneck microphones, are intended to sit atop a podium or lectern where a stationary presenter will be speaking. You’ll have many pickup pattern options with podium microphones, similar to other styles of microphones. You can also purchase bases for these microphones with features including “active” LED indicators and mute switches.
What They’re Good For
Podium microphones are excellent audio sources for stationary presenters who do not intend to move around during a lecture or presentation. Or they can serve as a backup audio source in rooms where a primary lavalier mic isn’t charged. You can attach these directly to a podium or use a base to make them functional on any desktop or table, making these mics a good choice for a panel of presenters sitting at a table, too (although you will need one microphone for each presenter).
What They’re Not Good For
Podium microphones are not recommended for any scenarios where the presenter will be moving around. Likewise, they are not ideal for recording scenarios in which more than one person will be presenting at a time, or for recording in-class discussions.
Price Range
Podium microphones can range from around $100 to $300, depending on features included.
Built-in mics
Many video recording devices already have built-in microphones for recording audio. However, these mics tend to produce fairly low quality audio compared to external, dedicated microphone sources. If you plan to use a native audio source, it’s a good idea to perform a test recording to check the audio quality ahead of time. Depending on the performance of the microphone, you may find you want to add a separate audio source.
What They’re Good For
Built-in microphones, such as those installed in most modern laptops and smartphones, or the native microphone in select camcorders and webcams, can sometimes be used effectively in quiet office spaces. They vary wildly in their quality, so be sure to test them before recording. For the best quality audio in this category, look for a webcam such as the Logitech C922, C930e, or Brio that captures stereo audio with noise cancellation technology.
What They’re Not Good For
Few if any built-in microphones will work well in any classroom where the recording device is set up more than arm’s length or two from the presenter. Likewise, they are not ideal for capturing group discussions, as anyone who is farther away from the microphone will be hard to hear.
>> Pay Attention to Pickup Patterns
The pickup or polar pattern of a microphone refers to the microphone’s sensitivity to sound relative to its direction or angle from the microphone. You will want to select a microphone whose pickup pattern will most effectively capture sound from the lecturer and minimize other sounds you don’t want to be recorded — for example, from the students in the audience.
Some microphones will give you the option to select more than one pickup pattern, while others will record only one type of pattern. As you provision audio recording devices for your classrooms, it’s important to understand the following pickup patterns:

- A mic with an omnidirectional pattern will be equally sensitive to sounds produced anywhere within range. This will be ideal for capturing full-room sound, but less so for capturing specific audio, such as the words being spoken by the instructors
- A mic with a unidirectional pattern will be most sensitive to sounds produced immediately in front of the microphone, while the sides will be less sensitive and the rear mostly ignored. This pickup will be ideal for capturing specific audio like the voice of a presenter, but less helpful for recording more open discussions.
- And a mic with a bi-directional pattern will prioritize sounds from both the front and back, while the sides are ignored. This is typically valuable only in more specialized use cases, such as when two presenters might be seated beside each other, or for recording music when the goal is to produce truly stereo sound.
Connecting Audio Recording Devices to Lecture Capture Systems
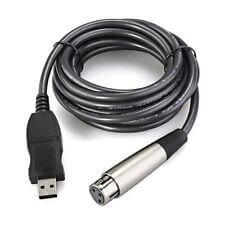 As with your video recording devices, your audio recorders will most often connect directly to your lecture capture computer. If your microphone cable does not align with any existing ports in your lecture capture computer, adapters should allow you to plug almost any type of microphone cable into your system. For example, higher-end microphones frequently output via XLR connections, requiring XLR-to-USB converters, such as those offered by Behringer, Shure, Blue, and Focusrite. Similarly, multiple audio sources will need to run through an audio mixer into your lecture capture computer.
4. Additional Lecture Capture Accessories
Along with the standard recording equipment, there are a variety of audio and visual accessories that you may need for your lecture capture implementations. While this particular space is rapidly changing, here is a quick overview of some of the most common accessories we see used for lecture capture today.
Video Switchers and Mixers
A switcher allows you to toggle between multiple video sources and send the source to one or multiple displays. This is useful for large auditorium setups that often need to capture multiple video feeds and have more complex display configurations.
Splitters
 A splitter allows you to send one display source to multiple peripherals or displays. For lecture capture purposes, you would use a splitter to send video from a lecturer’s display to both your lecture capture computer and to an audience-facing display.
Audio Mixers
An audio mixer or mixing console will let you capture and control multiple audio sources and levels. This is particularly useful if you are provisioning a room with multiple microphones to give lecturers more flexibility when presenting, or in rooms where you’ll have multiple presenters. To use your mixer, you’ll first feed your audio into the mixer and then plug the mixer into a USB or audio port in your lecture capture appliance.
Visual Recording Indicators
Visual recording indicators are small lights (typically LEDs) that turn on when a lecture capture system is recording. These are incredibly useful in rooms where you may have lectures scheduled to record automatically, giving faculty a quick visual confirmation that the recording is working as expected. Likewise, a visual indicator light can help a presenter realize more quickly when a lecture isn’t recording properly. Some models can even pause the recording with a tap.
Part III…
 Next week we’ll share technical diagrams for nine different lecture capture setups and use cases that show you how to connect all of your lecture capture equipment.
If you don’t want to wait, you can download our complete guide to setting up any room on campus for lecture capture for free, now. Download the complete guide to lecture capture anywhere.


