


Think back to just 10 years ago—producing a video required expensive cameras, studios, dedicated AV teams, and specialist post-production. Today, new video tools make it easy for teams and organizations to record formal and informal training videos without the need for expensive AV specialists or complicated recording equipment. Easy-to-use video training software can get your organization on its way to recording more engaging training videos for both formal and informal learning – and with a few simple tricks, you can still achieve the quality you’re looking for.
In this guide, you will learn:
- How to make an instructional video
- 7 tips For making webcam videos look good
- 5 tips to improve the audio quality in your video presentations
- 3 tips For better visual presentations (Powerpoint, Prezi, Google Slides, etc.)
- Why you should practice recording your training videos
- How to manage instructional videos
- How to use Panopto to record training videos
How to make an instructional video
Before diving into tips and tricks, let’s do a quick review of how to make an instructional video.
Instructional videos have a goal to educate, and they are best used in training programs due to easy scalability, flexibility in learning, and the opportunity to offer authenticity within the training program.
When creating your instructional videos, there are a few steps to keep in mind.
- Understand your goals and audience. Before anything else, you have to understand the intention behind your videos as well as your target audience. Use the “who, what, when, where, why, how” method to help you achieve a better understanding of your goals and audience in this step.
- Write your script. Once you have your topic and audience, it’s time to write the script to your video. Your script should include all information relevant to the goal of the training and in a way that the audience will understand.
- Record the video, both audio and visual. Now is your time to shine! Using your video training platform, record both the audio and visual elements of your presentation.
- Edit your video. Once recording is complete, spend some time editing your video to trim out any elements that do not provide value to your recording. With most softwares available today, editing is easy and doesn’t require a ton of technical knowledge to make an impact.
- Distribute to the team. Your final videos should be distributed to your team in an intuitive way. For example, add your training videos to your already existing video platform to make them easy to find and accessible.
- Refine. Feedback on training videos will help you understand what works and what doesn’t with your employees. Open yourself to any comments and suggestions from your employees and make refinements as necessary.
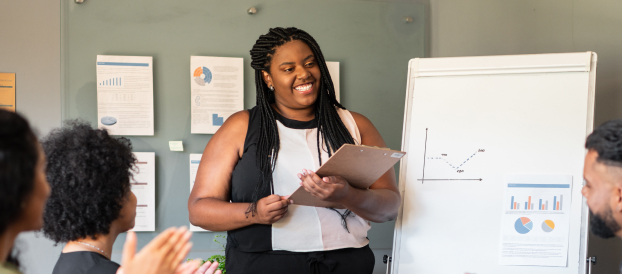
7 tips for making webcam videos look good
While the thought of recording yourself on camera may be overwhelming, take comfort in the fact that you don’t need fancy equipment to look as good as you do in person! Today’s technology offers high-quality images, and a few simple tricks with the camera can help you quickly achieve visual excellence and focus more on the content you’re presenting.
- Dress comfortably for the occasion. Since only your top half is showing on camera, focus on a solid color shirt that is appropriate for your audience and makes you feel comfortable. Pro tip: avoid small or distracting patterns that may take away from your appearance on camera.
- Flatter yourself with your webcam placement. It’s all about the angles! Flatter yourself by positioning your camera at or above eye level, no higher than your hairline. Be sure to also stay a comfortable distance away to capture your entire face and shoulders with some room to spare on each side.
- Use soft lighting from the front. Poor lighting can make you look like a shadowy figure or washed out. To avoid this, light yourself with soft, indirect lighting from your front and avoid strong light sources coming from behind you.
- Keep your background simple. To avoid further distractions from your presentation, be mindful of the background behind you. Keep things simple or, if possible, use a blur feature that will help keep the focus solely on you as the presenter.
- Connect with your audience: make eye contact and smile. While you may not be standing in front of your audience in person, making eye contact and connecting with viewers increases viewer engagement. Remember to look at your webcam and smile throughout your presentation.
- Use a USB microphone for better sound quality. While your video may look good, it’s vital to have quality audio too. If you use an internal microphone, be sure to test a recording to ensure you like the way the audio sounds. If not, try a USB microphone to increase the quality of your audio.
- Do a test video & practice with your webcam setup. Try a few test videos to not only practice giving your presentation, but also to make sure the quality of the recording is up to your standards.
5 tips to improve the audio quality in your video presentations
Visual elements in a recording are, of course, important to the final video – but many people forget that audio is just as important. Your presentation itself holds the bulk of information in a training video, and you can achieve quality audio with a few simple tricks.
- Remove as much ambient noise as possible. Noise such as fans or office equipment may not be loud enough to disturb your working day, but they may be heard and disrupt the audio during a recording.
- Choose the right audio recording equipment. Depending on your setting, you may want to invest in equipment such as external microphones and webcams. If the recording is done in a small space such as an office, your computer’s internal microphone and camera may work.
- If you choose to use music, leave it to the beginning and end of your presentation. Keep things simple – it’s difficult to hear your presentation with distracting music in the background. If you’d like to include music, stick to the first and last few seconds of your recording.
- Keep an eye on your input volume. Pay attention to your imput meter in your recorder. Try to keep noise levels in the green – if you hit the red too often during your recording, you may have distorted audio during playback.
- Don’t forget to soundcheck. Always remember to test before the final recording. Take a few test videos and watch them to ensure all audio sounds the way it should.
3 tips for better visual presentations (Powerpoint, Prezi, Google Slides, etc.)
Presentation slides don’t need to be boring! With just a few things to keep in mind, you can turn your visual elements from uninspiring to memorable and impactful.
- Structure your presentation. When creating your presentation slides, structuring the content to “flow” will help you share your story in a way the audience will understand. In addition, crafting a framework of what you plan to say will help you focus less on the slides and more on the delivery and story of the presentation itself.
- Minimize slide content to draw attention to what you’re saying. There’s no need to overload the slides with text and images – keep things simple by including main bullet points and expanding your throughs in your talk track. This way, the audience can focus on the details you’re presenting rather than being visually distracted.
- Think visually when designing presentation slides. People are visual learners, and you don’t need to be a graphic designer to make your signs appealing. Simple tips like using a sans serif font, keeping colors limited, and removing distracting animations instantly improve the visuals in a presentation.
Why you should practice recording your training videos
“Practice makes perfect” rings true when it comes to your training videos. Not only will a recorded practice session help you ensure your visual and audio elements look their best, but it will also give you an opportunity to practice your presentation. The more you have an opportunity to run through your training video before a final recording, the more conversational and natural your speaking will be. Public speaking isn’t always a talent someone is born with – but it is a talent that you are able to learn and study to make your presentations the best they can be.
How to manage instructional videos
Now that you have appealing instructional videos, you may be asking yourself – how do I distribute these to my team? Each organization may answer this differently, but there are five best practices to keep in mind while deciding how best to manage your video library in an effective manner.
- Understand your employees. A quick survey will help you better understand their behavior and needs will help you make a more informed decision on how to manage your instructional videos.
- Identify and populate useful content. Successful training programs are recorded videos given in an authentic manner and offer delivery flexibility.
- Help employees quickly and easily find content. An effective video learning library supports flexible, convenient, and quick access to information in the flow of every employee’s unique working style.
- Evangelize your video learning library. New programs aren’t always quickly received, so be sure to have a roll out plan that helps teams to see the business value.
- Iterate and improve. Approach your video library as a living platform and make updates as necessary to increase the reach and results.
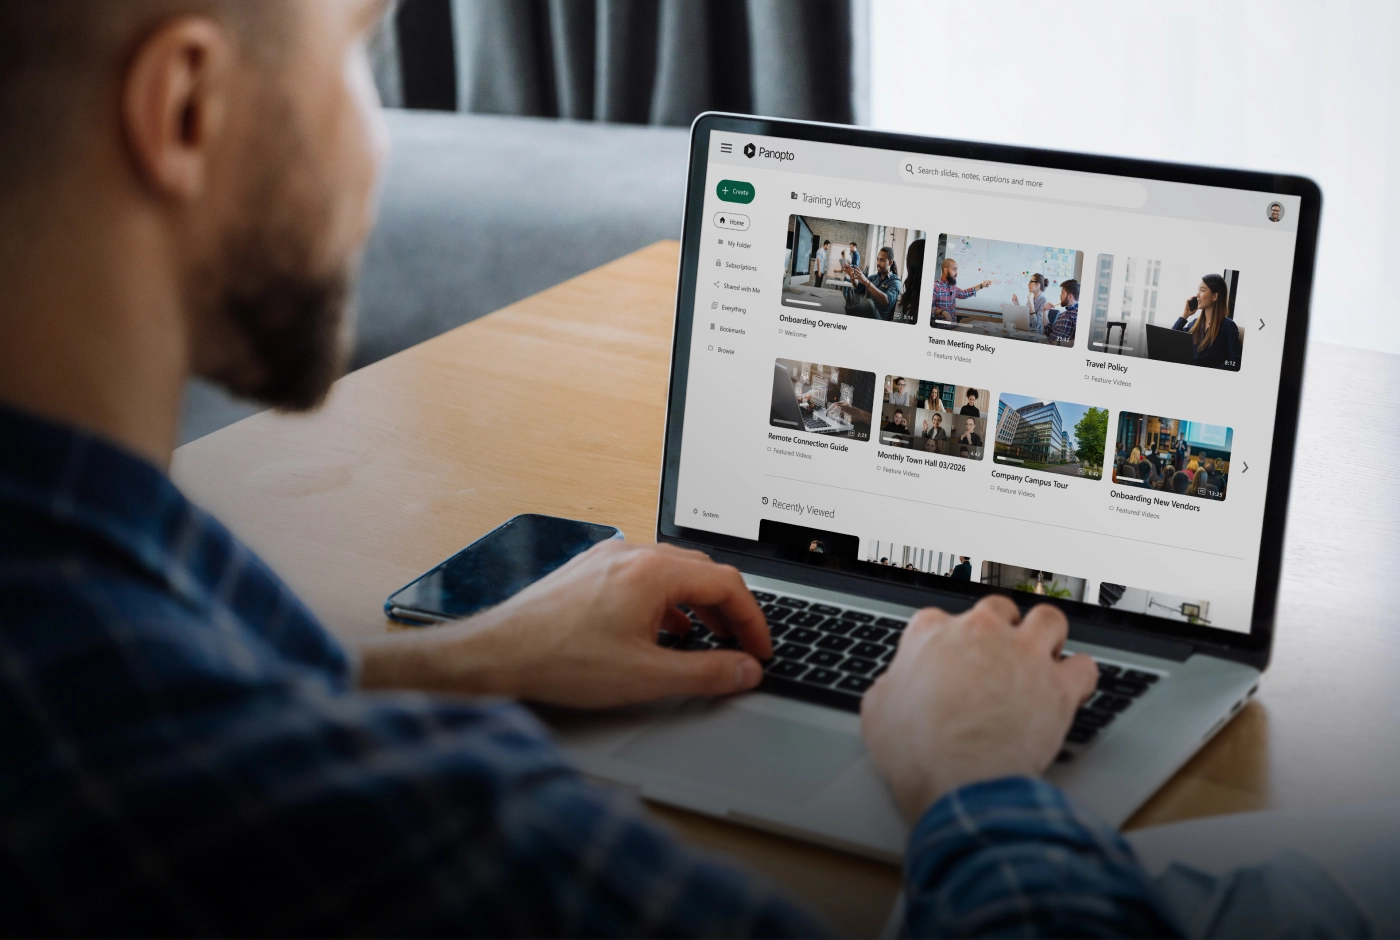
How to use Panopto to record training videos
Whether your goal is to increase recorded training, scale your training program while reducing costs, or you’re trying to leverage the power of social learning with video, video training software can help you achieve your goals by recording more engaging training videos for both formal and informal learning.
There are multiple solutions on the market to help you scale training with video – such as Panopto. Panopto is a platform to help businesses and universities improve the way they train, teach, and share knowledge.
To use Panopto, there are only five easy steps to your first recorded video.
- Prepare your slides, demo, and talking points for the training video.
- Select audio and video sources for your recording.
- Open your slides and anything you’re demonstrating, then select the screen(s) you want to capture.
- Record your training video.
- Edit your training video and share.
