- Academic Technology
How To Record & Share Videos With A Chromebook

In May 2011, Google announced the launch of its first Chromebook. Back then, users wondered how to screen record on Chromebooks. The concept of an inexpensive, web-centered laptop was met with a great deal of skepticism based on limited hard disk space, an unimpressive app marketplace, and an inability to function well offline. The Register suggested that Chromebooks were the biggest “flop of 2011.”
In the years that followed, though, these laptops would come to disrupt the personal computing industry. Chromebooks have even challenged the market share of macOS-based computers in the United States.
How to screen record on Chromebook
Leading this growth are academic institutions, which, by 2012, had become the largest category of Chromebook customers. Last year, Chromebooks made up 60 percent of all laptops and tablets purchased for U.S. K-12 classrooms. The laptops’ comparatively low price points and increasingly impressive specs have made them a perfect fit for students whose common computing activities include email, word processing, presentations, and spreadsheets have moved to the browser. Chromebooks can enable high-quality digital and online learning experiences for students without asking for many trade-offs.
For teachers who are now navigating the unfamiliar world of e-learning with their Chromebooks, and students who are trying to learn from home, Panopto now offers a lightweight easy-to-use online application for recording, sharing, and viewing class videos on Chromebooks.
Built-in Screen Recording Features on Chromebooks
Chromebooks running Chrome OS 89 or later come equipped with a built-in screen recording tool, eliminating the need for third-party applications. Here’s how to utilize this feature:
- Access the Screen Capture Tool:
- Click on the clock in the bottom-right corner to open the Quick Settings panel.
- Select the “Screen Capture” button (if not visible, click the small arrow to expand the menu).
- Choose Recording Options:
- In the toolbar, select the video camera icon to switch to screen recording mode.
- Choose from the following options:
- Full Screen: Record the entire screen.
- Partial Screen: Click and drag to select a specific area to record.
- Window: Record a specific window or application.
- Start Recording:
- Click the “Record” button to begin.
- A countdown will appear, after which the recording starts.
- Stop Recording:
- Click the red stop button located in the bottom-right corner of the taskbar.
Your recordings are saved in the “Downloads” folder by default. To manage storage efficiently, consider moving important recordings to Google Drive or an external storage device.
The Best Screen Recorder for Chromebooks
For teachers using Chromebooks, Panopto’s free online video and screen recorder not only makes it easy to record video lessons, but also simplifies the process of sharing them with students. You don’t even have to sign up for Panopto to use it.
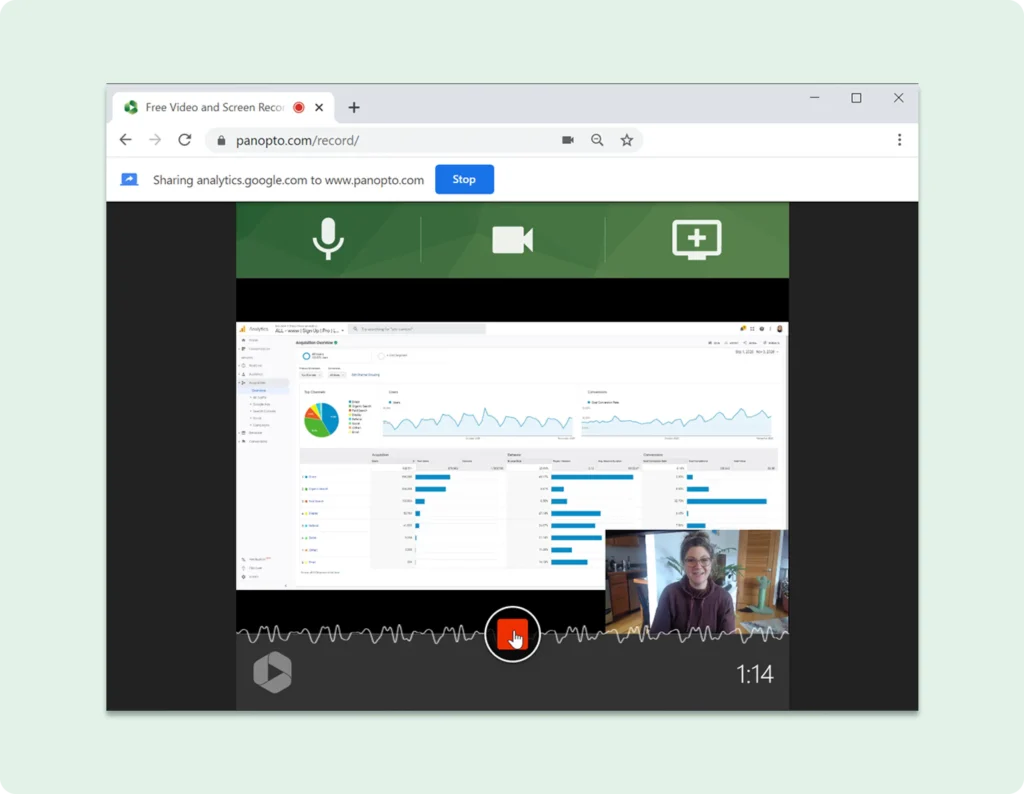
Here’s how to capture a facecam video and a screen recording simultaneously using Panopto’s free video recording tool for Chromebook:
- Click here to open Panopto Express in your web browser, click “Start Recording Now,” and then click the prompts to allow Panopto and your browser to access your webcam and microphone (you only need to do this on your first visit).
- Panopto will automatically detect your connected recording devices, so all you need to do is select the devices with which you’d like to record. Click the icons at the top of the recorder screen then toggle your microphone, webcam, and screens on and off.
- Click the gear icon in the lower right corner to turn on Ultra HD recording (4K), virtual background blur and replacement, and Panopto’s auto-tracking Smart Camera feature that keeps you centered in the video frame if you want to move around while you present.
- Open your presentation slides (such as PowerPoint or Google Slides) or any program you want to show on the screen(s) you’re recording.
- You’re all set up. Click the red record button and begin teaching.

When you’re done presenting your lesson, click the red button again to stop the recording. Panopto automatically begins processing your video for easy online sharing. From here, you can share securely with your students through Panopto, upload your video to YouTube or Google Classroom, or you can download the video file to your computer.
The best part is there’s no time limit on recording, no ads, no watermark — you own the video content you create. You can also edit your recording to polish it up with video editing software before sharing, or upload your video to Panopto to use our free online video editor.
Helpful tip from our users: If you make a mistake or want to present a part of your lesson a different way, don’t hit stop — keep recording and simply pause to take a big breath, then begin teaching again. You can edit out the section you don’t want after you’re done and you’ll have a nice quiet pause in which to make the cut.

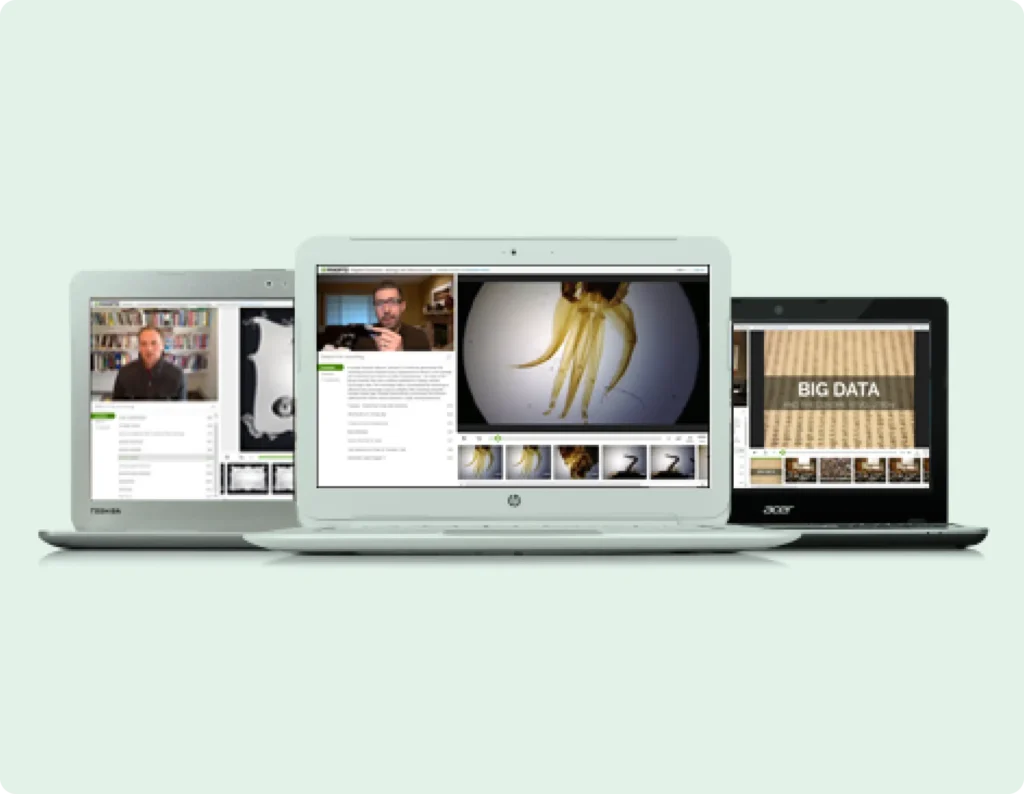
Panopto’s video player works perfectly on any Chromebook.
Can Students Watch Panopto Videos on a Chromebook?
Yes.
Lecture recording, flipped classrooms, and student video projects have become as much a part of today’s classroom as email, documents, presentations, and spreadsheets.
To support the growing number of students, schools, and universities who have invested in Chromebooks, Panopto’s media streaming technology delivers Panopto’s unique learning-optimized video playback experience to anyone using a Chromebook. In Panopto, students see their teacher presenting the lesson alongside their screen, a Google Slides presentation, and even other video sources in a classroom-like virtual learning environment — right inside their web browser.
Unique, multi-stream video playback provides a more true-to-life experience for students on any laptop, including Chromebooks.
In addition, Panopto includes playback features that help students learn at a personalized pace. Using variable speed playback, students can slow videos down in order to focus on complex topics or speed them up to quickly review their on-demand lessons.
Panopto’s video player also supports adaptive bitrate streaming (ABS), which dynamically adjusts the playback quality based on available network bandwidth. This provides faster video startup, reduces seek times, and minimizes buffering during playback for students who may have slower internet connections.
As part of a great online learning experience, students using Chromebooks have access to all of the interactive tools within Panopto’s video player, too. This includes Smart Search, which enables students to find and instantly fast-forward to words spoken or shown within videos, and digital notes, which enable them to bookmark points inside a video future reference as a study aid.
One of our primary goals at Panopto is to make software that brings a high-quality online learning experience to a broader range of platforms and devices. For the 40 million students and educators around the world using Chromebooks, we’re proud to say we can support the deliver of high-quality online learning content on one of the most widely-used devices in education.
Tips for Effective Screen Recording on Chromebooks
To ensure high-quality recordings, consider the following best practices:
- Prepare Your Content: Organize your materials and have any necessary applications or tabs open before starting the recording.
- Check Audio Settings: If your recording includes narration, ensure your microphone is working correctly, and test the audio levels.
- Minimize Distractions: Close unnecessary tabs and applications to prevent notifications or pop-ups during the recording.
- Practice First: Do a short test recording to familiarize yourself with the process and identify any potential issues.
By following these tips, you can create professional and effective screen recordings on your Chromebook.
Looking for an e-learning solution that works with your school’s Chromebooks?
Panopto can power virtual classrooms for your entire school to make e-learning simple and successful.


